I have been using Terraform for a few years now, and I have to say that I am a big fan. It is versatile and can be extended using PowerShell, Bash, Command line, and ARM where needed to fill gaps in its coverage. Here we are going to have a quick look at how to deploy an Azure SQL Database using Terraform.
Assumptions
I’m going to make the following assumptions about the setup of your client workstation before we start writing any HCL and deploying resources.
- You already have an Azure subscription with sufficient permissions to deploy a resource group and resources within it.
- You have a scripting IDE for writing the HashiCorp Configuraiton Language HCL (I’m using VSCode with the Azure Terraform, and Hashicorp Terraform extensions).
- You have downloaded and configured Terraform so that it is in the PATH environment variable. You can find information here about how to setup and configure Terraform if you need.
- You have installed the Azure CLI, logged in, and set your default subscription.
Resources
All of the code for this post can be found in this GitHub repository.
What Are We Deploying?
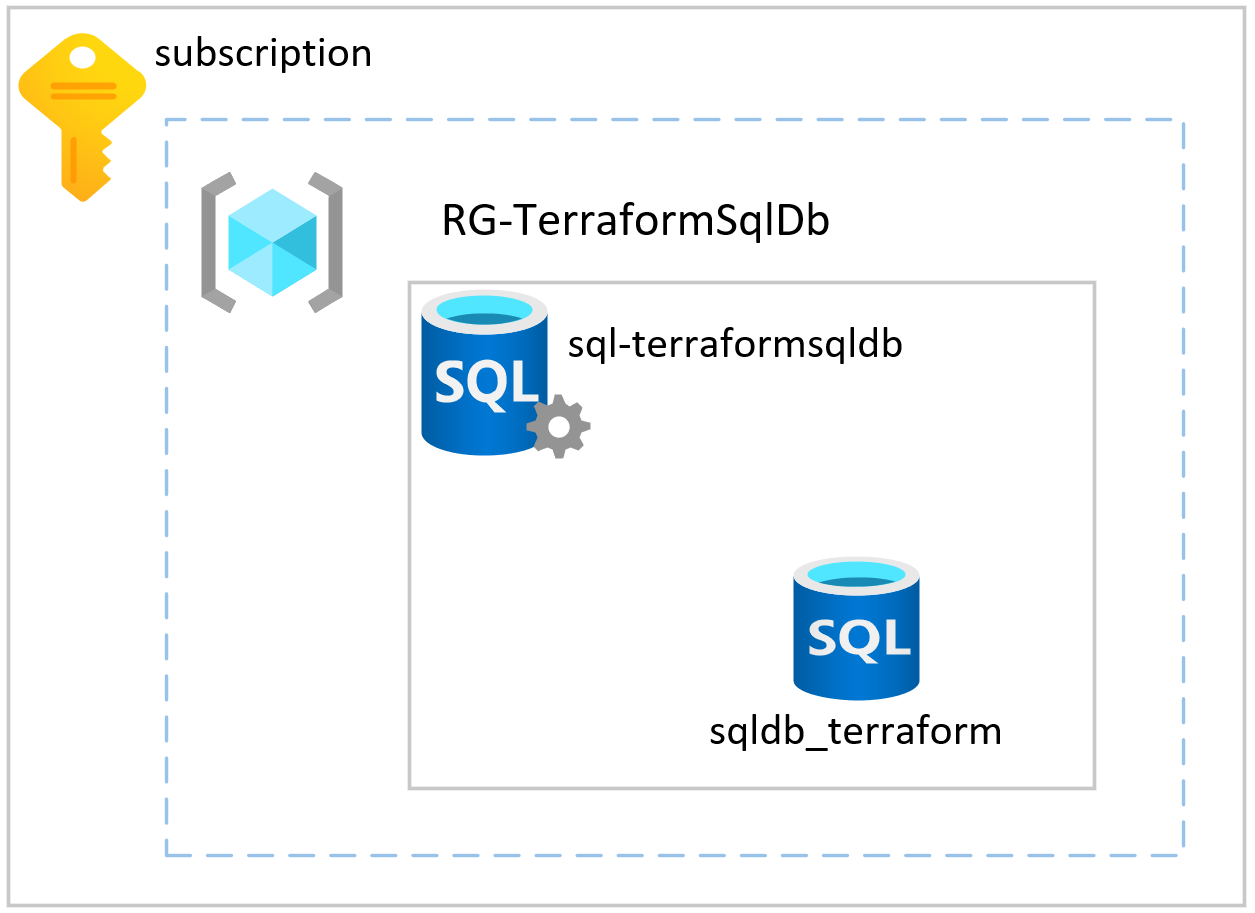
When we think about what we need to do in order to deploy an Azure SQL Database there are several key resources which need to be deployed to support the database. In order to do this we need to deploy a Resource Group, Azure SQL Server, and then the Azure SQL Database.
Terraform Project Layout
As this is a relatively small Terraform deployment I will look to keep my project structure minimal. I personally, like to break out the Provider definition, Tags, and Variables into their own files. I then define my infrastructure within the main.tf file. However, for larger deployments I will go a bit more granular for ease of code maintenance. Additionally, I tend to try to make all my resource definitions as dynamic as possible by using variables extensively. I’m also a fan of making sure that resource names are descriptive so the if I am troubleshooting things that I can track back through logs quickly.
Variables are something that we need to use to really get the most out of Terraform, especially for being able to seamlessly promote infrastructure through environments. However, declaring the variables is a chicken Vs. egg question. Some people define them all up front, I much prefer to define my variables as I go and then collate them into a variables.tf file at the end. What you will see below is the outcome and the reason why I will address the variables after the resource definitions.
Resource Definition
The first resource which we are deploying is the resource group in which our Azure SQL Database will reside. This is our most fundamental unit within Azure in which all other resources must reside. It is also possible to have a pre-staged resource group in Azure, in which case you can limit the permissions needed for the account deploying the resources with Terraform to contributor or owner on that resource group which will help limit the permissions within the environment.
1resource "azurerm_resource_group" "rg-deployment-core" {
2  name     = var.ResourceGroupName
3  location = var.ResourceGroupLocation
4}
Now that we have the Resource Group defined we can bring our next resource into play, the Azure SQL Server. One of the key features which I love about using Terraform is the ability to create implicit dependencies by referencing the attributes of other resources. This not only aids in code maintenance as changes are cascaded easily, but also it helps Terraform to build a dependency graph which allows it to figure out what sequence resources can be deployed in.
You can see here that I am referencing the resource group defined in the previous step which means that I can pull in the name and Azure region for deployment. This will also let Terraform know that the resource group must exist first before this SQL Server is deployed. You’ll notice that I’m going for Entra ID only for the admin, this is because the username and password for SQL Authentication, if provided, will be stored in clear text in the state file. This is called out in the Terraform documentation for the server resource here.
 1resource "azurerm_mssql_server" "az-sqlServer-01" {
 2  name                = var.azSqlServer01-Name
 3  location            = azurerm_resource_group.rg-deployment-core.location
 4  resource_group_name = azurerm_resource_group.rg-deployment-core.name
 5  version             = "12.0"
 6  ## Preference to use Entra ID auth as SQL username & password will be stored in plain text in plan/state files if used.
 7  azuread_administrator {
 8    login_username              = var.azSqlServer01-aadAdminName
 9    object_id                   = var.azSqlServer01-aadObjectId
10    azuread_authentication_only = true
11  }
12}
The SQL Server which we are deploying here is a PaaS representation of a SQL Server which we will connect to, handles authentication and authorisation, as well as acting as the collection under which our sql databases will exist. Whereas historically we would use a CREATE DATABASE statement, here we are deploying it via Azure as it is a manageable resource. Again I will reference back to the SQL Server resource for attributes needed to create the database.
1resource "azurerm_mssql_database" "az-sqldb-01" {
2  name           = var.azSqlDb01-Name
3  server_id      = azurerm_mssql_server.az-sqlServer-01.id
4  collation      = var.azSqlDb01-Collation
5  max_size_gb    = var.azSqlDb01-MaxSizeGb
6  sku_name       = var.azSqlDb01-SkuName
7  zone_redundant = var.azSqlDb01-ZoneRedundant
8}
Now, when we define our variables they will all follow a standard pattern. I always type them, and put a descriptive, meaningful description in place. This description is what will be presented to users at the command line when they omit one, it is also good practice from a documentation perspective. While I cannot abide the “my code is self documenting” stance, in this case it does stand up to scrutiny. Below are a couple of examples of variable declarations in Terraform that demonstrate the types of descriptions I find really useful.
 1variable "ResourceGroupName" {
 2  type        = string
 3  description = "Please provide a name for the resource group."
 4}
 5variable "ResourceGroupLocation" {
 6  type        = string
 7  description = "Please provide an Azure region for the resource group."
 8}
 9variable "azSqlServer01-Name" {
10  type        = string
11  description = "Please provide a name for the Azure SQL Server."
12}
13....
One thing that I try to avoid using is default values for variables. This is a personal preference because I like to make sure that things are set explicitly so that I minimise the number of rabbit holes that I have to run down when it comes to troubleshooting why something is misbehaving.
Now that we have the project defined we can look at the different stages of the Terraform project lifecycle. It is broken down into three key sections, I refer to these as pre-deployment, deployment, and teardown. In pre-deployment we are making sure that we are happy with what is going to be created, deployment is where our resources are created, and then teardown is at the end of the lifecycle using Terraform destroy to remove them.
Pre-Deployment
Ahead of running the deployment we have two options open to us when it comes to validating what we have written. The first is to use the Graph option with Terraform which will generate a DOT notation digraph output which we can then feed into Graphviz or similar give us a visual representation of our deployment. Before we can perform these tasks we need to initialise our Terraform project using the init option. This will download the providers we need as well as setup the directory structure for subsequent actions. We can see the what happens when we run Terraform Init below.
After running init, we can run terrafrom graph which will give us the output below. It is depending on the graph complexity you want you can use the -type flag to add more information into the output beyond the basic summary. I have used -type=plan to generate the digraph and graph image which you can find in the repo.
 1digraph {
 2	compound = "true"
 3	newrank = "true"
 4	subgraph "root" {
 5		"[root] azurerm_mssql_database.az-sqldb-01 (expand)" [label = "azurerm_mssql_database.az-sqldb-01", shape = "box"]
 6		"[root] azurerm_mssql_server.az-sqlServer-01 (expand)" [label = "azurerm_mssql_server.az-sqlServer-01", shape = "box"]
 7		"[root] azurerm_resource_group.rg-deployment-core (expand)" [label = "azurerm_resource_group.rg-deployment-core", shape = "box"]
 8		"[root] provider[\"registry.terraform.io/hashicorp/azurerm\"]" [label = "provider[\"registry.terraform.io/hashicorp/azurerm\"]", shape = "diamond"]
 9		"[root] var.ResourceGroupLocation" [label = "var.ResourceGroupLocation", shape = "note"]
10		"[root] var.ResourceGroupName" [label = "var.ResourceGroupName", shape = "note"]
11		"[root] var.azSqlDb01-Collation" [label = "var.azSqlDb01-Collation", shape = "note"]
12
13.... <Trucated output>
14
15		"[root] azurerm_resource_group.rg-deployment-core (expand)" -> "[root] provider[\"registry.terraform.io/hashicorp/azurerm\"]"
16		"[root] azurerm_resource_group.rg-deployment-core (expand)" -> "[root] var.ResourceGroupLocation"
17		"[root] azurerm_resource_group.rg-deployment-core (expand)" -> "[root] var.ResourceGroupName"
18		"[root] provider[\"registry.terraform.io/hashicorp/azurerm\"] (close)" -> "[root] azurerm_mssql_database.az-sqldb-01 (expand)"
19		"[root] root" -> "[root] provider[\"registry.terraform.io/hashicorp/azurerm\"] (close)"
20	}
21}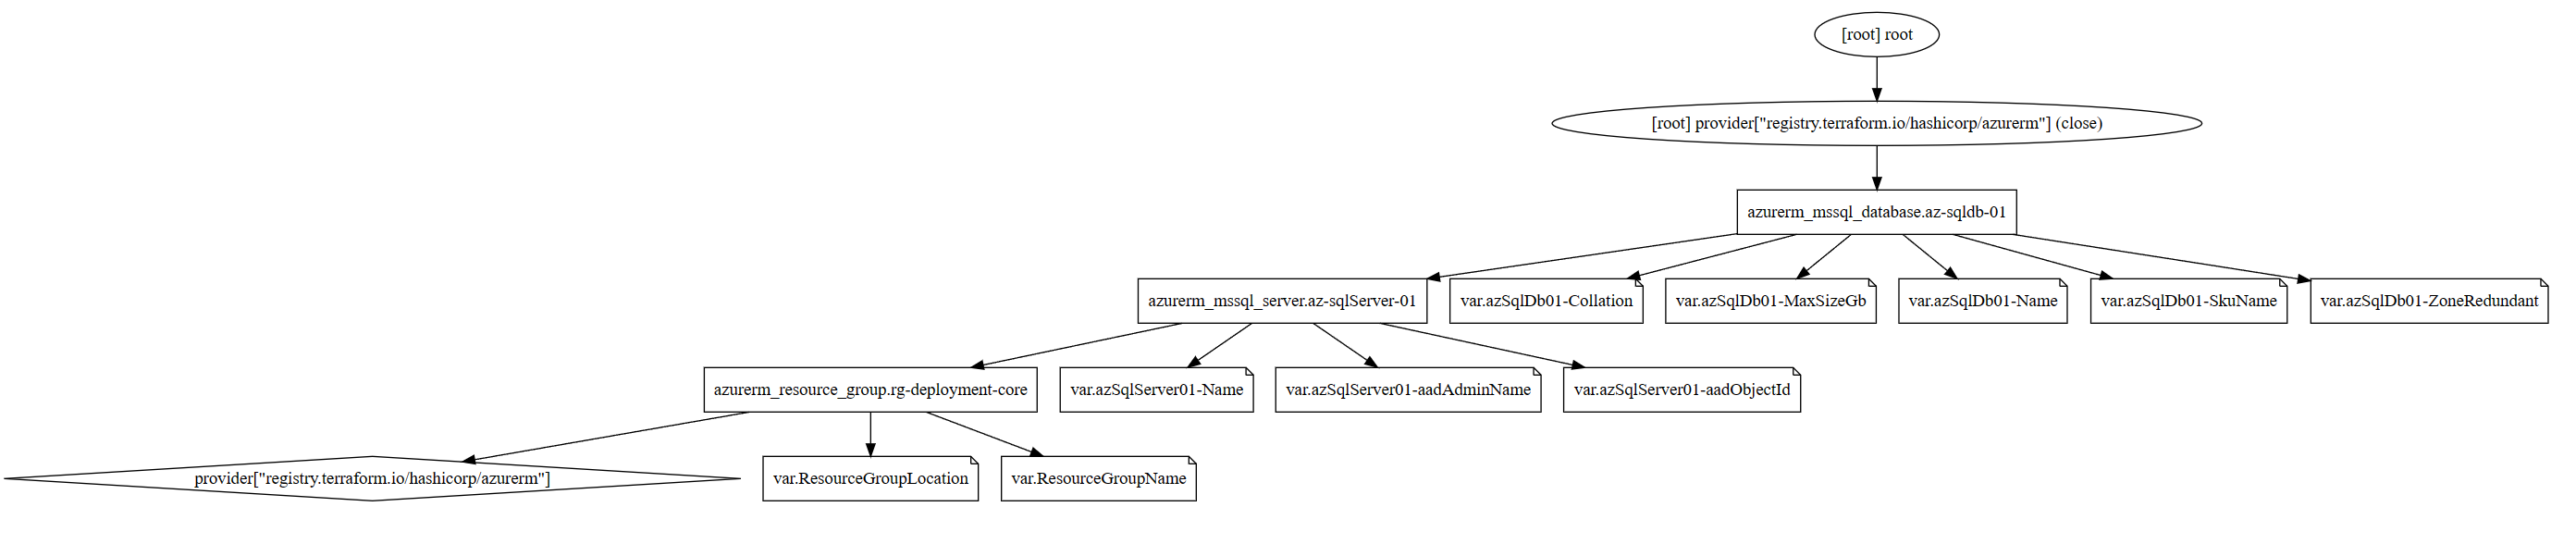
Graph of Azure Resources.
The other tool at our disposal is the plan option for Terraform. This is a process whereby Terraform will simulate a deployment and give us an output of which resources will be created, modified, or destroyed based on what we have defined and what exists presently. The output from Terraform Plan can be seen below.
Deployment
Once we are happy with what will be deployed then we can use Terraform Apply to make the changes and deploy our resources. Part of this process is to also run an apply and request a response to proceed or exit. This prompt can be suppressed for automation through another command line switch. As we are deploying by hand at the moment we will provide a response to confirm that we want to proceed. This can be seen below.
Now that we have our core resources deployed then we can move forward with subsequent configuration. I would look to update the project and add the resource configurations needed to achieve the outcome I am looking for. However, it is possible to set a boundary between what is controlled by Terraform and what is not. This is done with a lifecycle block where we can define what is out of scope for Terraform to monitor and set, I will not go into that in detail here but will cover it in depth in another post as it is worth looking at in detail.
Teardown
Once we are done with our resources Terraform makes it relatively easy to remove them via the destroy command. This really comes into its own when we are using Terraform for spinning up and removing temporary resources as part of build and test automation for applications etc. It means that we can minimise our cloud cost overheads by not needing to maintain a persistent infrastructure. Below we can see the Terraform destroy process, again you will notice it runs a plan and asks for confirmation in the same way the apply works.
Summary
So, this was a short tour to demonstrate some of the capabilities of Terraform and how we can use it to deploy and manage cloud based resources. One of the things I really like is the standardisation of the interface when dealing with multiple cloud vendors. While the resource definitions are unique per-provider, having a consistent syntax and tool to deploy resources to Azure, AWS, GCP, and many other services can be a real time saver. It also means that we can use the right service for the workload which we want to deploy without needing to learn and maintain multiple infrastructure definition tools.
Keep checking back for new posts where I go deeper into some of the things that we can do with Terraform.
Thanks
/JQ
-
Previous
Tales from the T-SQL Tuesday Archive: #019 - Disaster Recovery -
Next
SQL Bits 2024 - Post Event Write Up